Casa D

Display your final art here...
Forum rules
Important notice: All artwork submitted on our public gallery forums gallery forums may or may not be used by OTOY for publication on our website gallery.
If you do not want us to publish your art, please mention it in your post clearly. (put a very red small diagonal cross in the top left corner of the image)
Any images already published on the gallery will be removed if the original author asks us to do so.
We recommend placing your credits on the images so you benefit from the exposure too, and use a minimum image width of 1200 pixels, and pathtracing or PMC. Thanks for your attention, The OctaneRender Team.


For new users: this forum is moderated. Your first post will appear only after it has been reviewed by a moderator, so it will not show up immediately.

This is necessary to avoid this forum being flooded by spam.
Post Reply
User avatar
RainerS
Licensed Customer
Posts: 49
Joined: Thu Jul 08, 2010 7:58 am
Location: Estonia
Contact:

Hey, these are pretty much my first exterior architecture renderings ever, would love to hear what you think :)
PS. I'm planning to make an archviz animation out of this

Image

Image

Image

Image
Windows 7 64bit | Geforce 260GTX | 4GB
Alain
Licensed Customer
Posts: 270
Joined: Tue Jan 12, 2010 12:12 pm

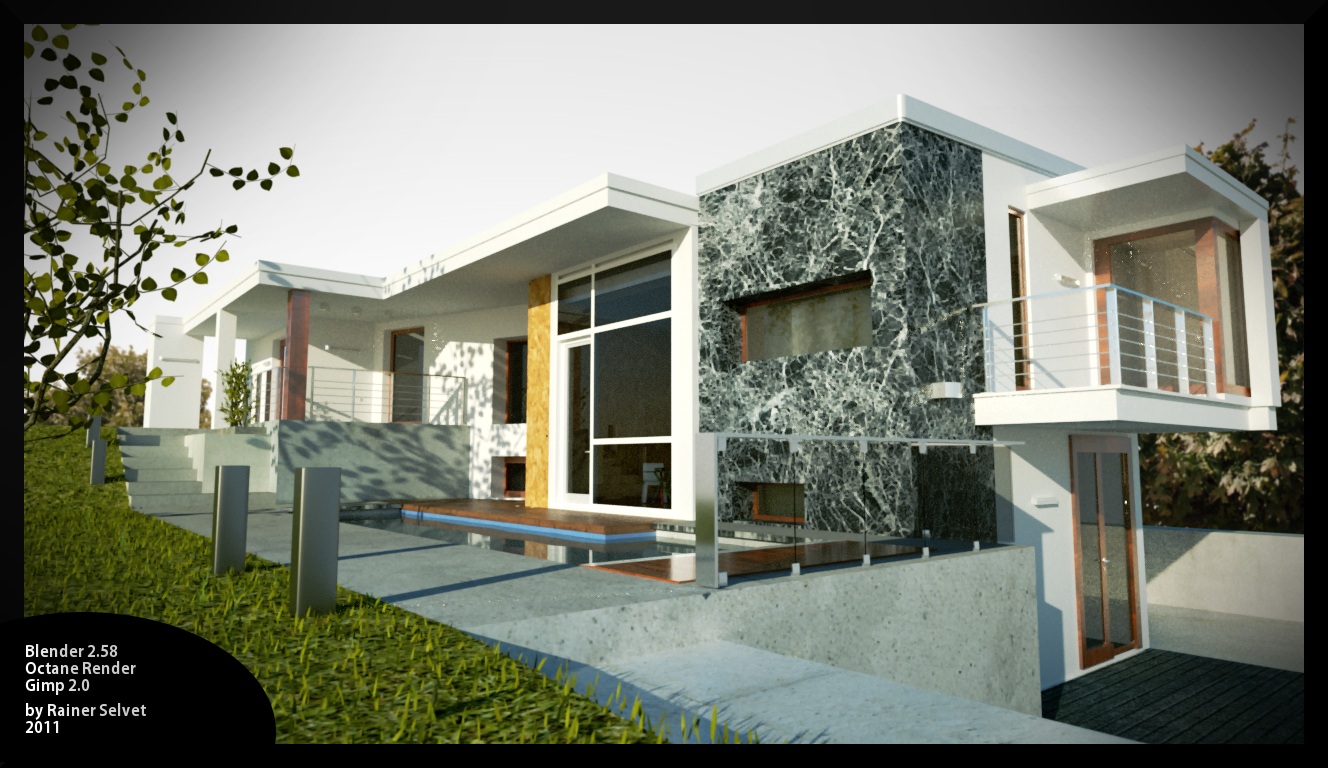
Not so bad for your first architecture visualization.

Here some recommendations:
-Number 1, 3 and 4 are almost the same. Only post your favorite one ;-)
-Shift verticals.
-Do realistic grass, at the moment with octane the easiest way is to do in postproduction. Do the same with the tree in the foreground.
-Be carefull with the size and wraping of the texture. Textures seems to be to big in some cases.
-Add more details, I think some forms are not right in its proportion (the reailing for example).
-There are some good inspirations for architecture on Ronen Bekermans blog: http://www.ronenbekerman.com/
-...

I hope it helps :-)

Kind regards
Alain
Intel Pentium 2.8 GHz 2 Cores, 8 GB RAM, GeForce GTX Titan 8GB, Blender 2.72b, Win 7 64 Bit
User avatar
radiant
Licensed Customer
Posts: 699
Joined: Mon Apr 05, 2010 12:00 pm
Location: Adelaide, Australia
Contact:

here are some things that i noticed, looking forward to the turntables.

Image
Win8 Pro 64bit ULT|Intel Core i7 3930K|3.20 GHz|32 GB RAM|GTX 590|UD5 2011 socket||2x TB HD||Master Cooler HAF X||Blender 2.6||Maya 2012||Octane|
User avatar
RainerS
Licensed Customer
Posts: 49
Joined: Thu Jul 08, 2010 7:58 am
Location: Estonia
Contact:

Thank you very much for the critique! I'll be sure to turn my attention to these points when working on next projects.
I totally agree about the grass and the tree, I really wanted to make the grass more thick, but I started to have real problems on my dualcore @ 300k poly or so and the exporting crashed often..
Oh and by "archviz animation" I didn't mean a turntable, more like showing the house's different parts etc. But I might wait with that and make more projects like this, also interior ones to learn better lighting tricks for archviz and getting out of the overall *noob* state :D

Also, Alan thanks very much for that blog link!
btw this is the original inspiration
http://www.contemporist.com/wp-content/ ... 611_01.jpg
Last edited by RainerS on Wed Jul 13, 2011 11:34 am, edited 1 time in total.
Windows 7 64bit | Geforce 260GTX | 4GB
Alain
Licensed Customer
Posts: 270
Joined: Tue Jan 12, 2010 12:12 pm

I just wanted to say "wow, great improvement !" and then I saw it's just your inspiration foto.

Keep on trying, I'm sure you will get it very close to the original ;-)

Kind regards
Alain
Intel Pentium 2.8 GHz 2 Cores, 8 GB RAM, GeForce GTX Titan 8GB, Blender 2.72b, Win 7 64 Bit
User avatar
RainerS
Licensed Customer
Posts: 49
Joined: Thu Jul 08, 2010 7:58 am
Location: Estonia
Contact:

I really want to try to make the lighting more attractive-blue'ish, but I'm not able to get much light into the rooms visible. You can see from the 1st pic that its pretty dark in the room at the center of the frame. Using an non-opaque emitter plane with normal inside would help?

Alan, you also mentioned about making the grass in post-pro. How would you do it? Try to find a good grass image with similar perspective and use that to fill the grassy area?

I changed the inspiration image to link-only, to keep people from being confused :lol:
Windows 7 64bit | Geforce 260GTX | 4GB
adiarc
Licensed Customer
Posts: 63
Joined: Thu Mar 17, 2011 7:32 am

Did you try direct light? There is many times a very small difference between dl and pt in outdoor scenes, but dl is much faster and no fireflies. Also the interiors will not be completely dark.

For the bluish tint, I would try different camera response presets.

-a
Alain
Licensed Customer
Posts: 270
Joined: Tue Jan 12, 2010 12:12 pm

RainerS wrote: Alan, you also mentioned about making the grass in post-pro. How would you do it? Try to find a good grass image with similar perspective and use that to fill the grassy area?
Yes exactly :-)
You have to create a mask in Photoshop/ Gimp for the grassmaterial. And add manually strands at the edges where grass "pushes" into other materials.
Some 3D Software (Blender, Max, etc.) can render Masks for each material or geometry. This can save you time for creating masks. I would try a displacementgeometry to create automaticly strands along the edges.


Kind regards
Alain
Intel Pentium 2.8 GHz 2 Cores, 8 GB RAM, GeForce GTX Titan 8GB, Blender 2.72b, Win 7 64 Bit
Post Reply

Return to “M is for Metaverse Gallery”