Taillight Not Quite Right

Maxon Cinema 4D (Export script developed by abstrax, Integrated Plugin developed by aoktar)

Moderators: ChrisHekman, aoktar

Post Reply
RyanTScottLLC
Licensed Customer
Posts: 6
Joined: Fri Jun 10, 2016 7:02 pm

Hello all, and thanks for reading.

I'm trying to dial in the look of a taillight for and please see below for where I'm currently at.
Taillight not right.png
My current setup consists of an emissive white material applied to the "bulb" geo and a transmissive red material applied "bulb casing" geo that wraps around the bulb.

I did add thickness to the "bulb casing" via the thickness command...

I think I'm getting hung up on the material settings for both the emissive and transmissive materials.

Please see my current render settings below.
Current Render Settings.png
Any info is greatly appreciated.
skientia
Licensed Customer
Posts: 264
Joined: Tue Mar 12, 2024 1:50 am
Contact:

In practice, it's relatively quick to improve.

TL;DR
White L.E.D. + Red Glass with Gaussian Spectrum Transmission Color + AgX OCIO (or via Octane's Output AOV "compositor")

Further Details
The following pages cover all the relevant topics of this post:
Image
boxfx
Licensed Customer
Posts: 276
Joined: Fri Apr 27, 2012 9:13 am

RyanTScottLLC wrote:I'm trying to dial in the look of a taillight for and please see below for where I'm currently at.
Generally your issue is that you've burnt out the brightness and likely have the red filters too red. By all means attach a scene with just the light and bulb cover so we can help. As a simple starting point, go to the "Imager" tab of your octane settings and have a play with the Highlight compression setting and the Clip to white setting. Highlight compression will take the brightest parts of your image and reign them in, allowing you to see the shapes of the brightest bits hidden within the solid blob of red. Similarly the Clip to white slider will let you roll your burnt out reds off into paler pinks and whites as they get brighter.

If that doesn't help then consider adding some imperfections into your red glass. Nothing in your daily life is red red, they're all just mostly red. So if the red glass material, add in some green and blue so the glass isnt too perfectly red.

Aalso consider the internal shapes. Brake light housing arent just a flat/curved piece of glass. Sure they're smooth on the outside, but inside the glass it will be a series of prisms and ridges which cause the brake light to refract light in different directions. If your glass has no internal structure then the brake light is going to look pretty dull.
RyanTScottLLC
Licensed Customer
Posts: 6
Joined: Fri Jun 10, 2016 7:02 pm

Thank you both so much. I'm coming from Redshift, so I haven't figured out where all the Octane buttons are yet... :oops:

Please see the attached simplified taillight project file and thanks for the great info and resources!
Attachments
Taillight_forOtoyForum.zip
(1.33 MiB) Downloaded 83 times
skientia
Licensed Customer
Posts: 264
Joined: Tue Mar 12, 2024 1:50 am
Contact:

boxfx wrote: Generally your issue is that you've burnt out the brightness and likely have the red filters too red.
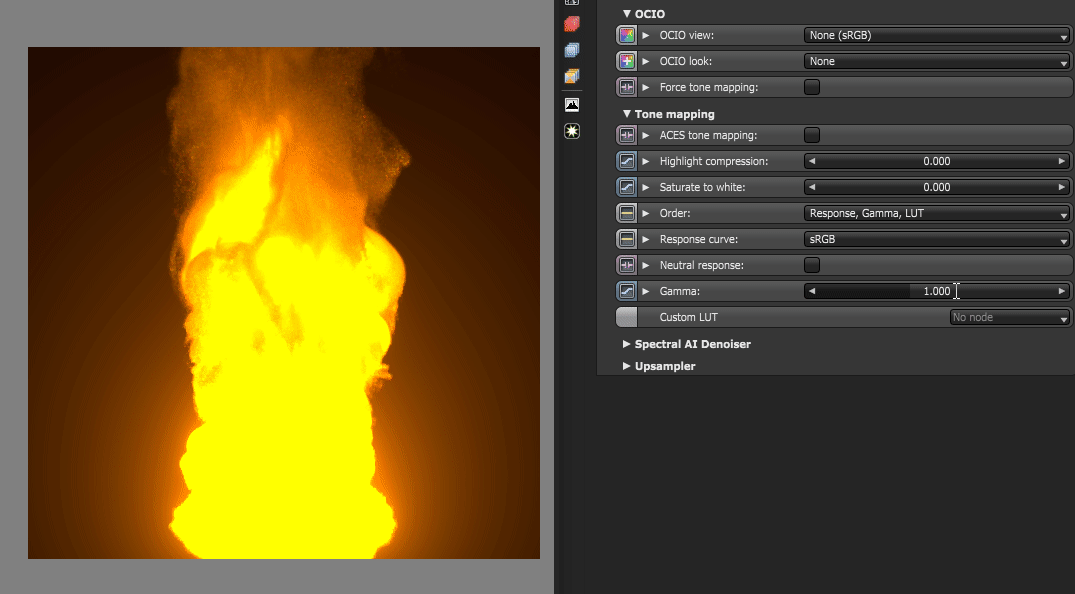
To put it concisely, a renderer is processing and encoding data in floating point; it's near the end of the signal chain (output medium 'display-conformation') that limitations are becoming obstacles and producing flaws / errors, some of the notable ones being "clipping", "saturation".
boxfx wrote: By all means attach a scene with just the light and bulb cover so we can help. As a simple starting point, go to the "Imager" tab of your octane settings and have a play with the Highlight compression setting and the Clip to white setting. Highlight compression will take the brightest parts of your image and rein them in, allowing you to see the shapes of the brightest bits hidden within the solid blob of red. Similarly the Clip to white slider will let you roll your burnt out reds off into paler pinks and whites as they get brighter.
It's one of the easiest situation to solve, as demonstrated in the preceding reply.
Unfortunately, the native Imager parameters are not suited for most "hard" cases of this sort, only "soft ones".
It is demonstrated here and this scenario would yield unsatisfactory results as well (predictably and expectedly).
boxfx wrote: If that doesn't help then consider adding some imperfections into your red glass. Nothing in your daily life is red red, they're all just mostly red. So if the red glass material, add in some green and blue so the glass isnt too perfectly red.
Nothing in reality is as we think it is; "color" (stimuli) or "vision" (HSV) is psycho-neurophysiology domain as it happens "formed" in our brain, akin to sound (psycho-acoustic).
Yet, this reply has highlighted a fundamental aspect in rendering: in case of an RGB node based "coloring", this is upmost important [to avoid pure "color" values], albeit the recommended approach is the Gaussian Spectrum node, as aforementioned, less user-friendly but superior results due to the underlying math of it all.
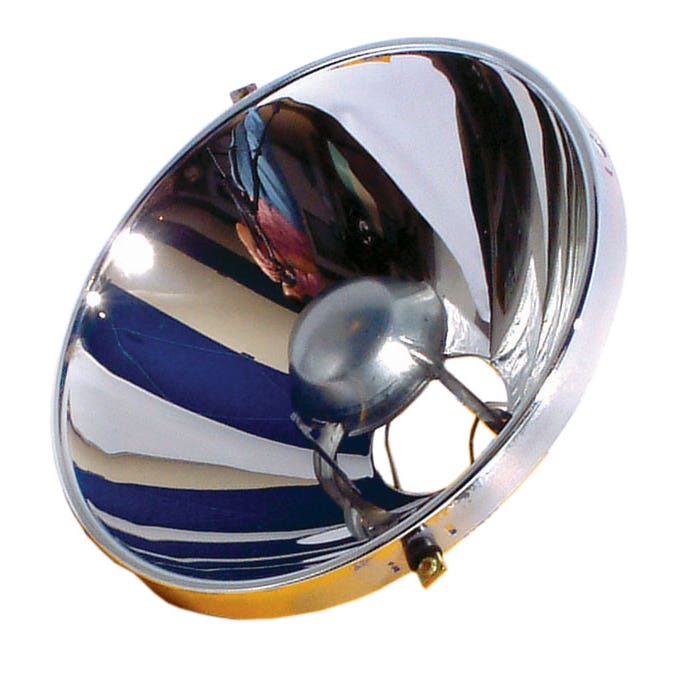
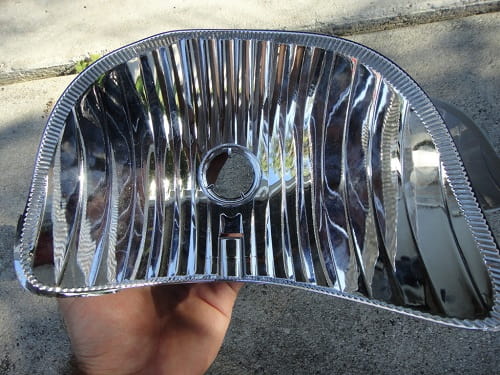
boxfx wrote: Aalso consider the internal shapes. Brake light housing arent just a flat/curved piece of glass. Sure they're smooth on the outside, but inside the glass it will be a series of prisms and ridges which cause the brake light to refract light in different directions. If your glass has no internal structure then the brake light is going to look pretty dull.
Another solid advice to which one could argue that not all lights are designed with complexity, particularly old ones from decades ago where the design was essentially the emitting source and a curved reflector to focus the rays, similarly to a Fresnel lens but with a mirror-like reflection (also present in flash lights).
Post Reply

Return to “Maxon Cinema 4D”