Why am I getting a white line when rending object separately

Blender (Export script developed by yoyoz; Integrated Plugin developed by JimStar)
Yngvai
Licensed Customer
Posts: 27
Joined: Thu Nov 11, 2021 11:13 pm

I've got a CG car I'm compositing into live footage using Blender, Octane, and then After Effects. I render the car and the ground plane/shadow catcher as separate EXR files. This allows me to control the color tone of the shadow in after effects without impacting the car.

However, when I do it this way, I'm getting a small white outline around the tires of the car where the shadow is when I bring both EXR's into After Effects. This is despite going to "Interpret Footage" in AE and selecting "Straight - Unmatted" for the EXR's.

Image

To fix it, I use "Levels" in AE bringing the alpha channel white input from 255 all the way down to 5. However, this also decreases the sharpness of the overall border around the entire car.

Image

Note this is NOT an issue at all if I render the car and shadow together in Blender/Octane rather than as separate layers. However, then I lose the ability to adjust the shadow in AE independently of the car.

Image

So why is a white outline appearing when I render the layers separately and bring them into AE, but not when I render them together as one layer and bring into AE?
frankmci
Licensed Customer
Posts: 917
Joined: Fri May 26, 2017 2:00 pm
Location: Washington DC

This doesn't directly answer your question, but you can use the Car+Shadow pass for the primary RGB, then use the Shadow Only pass as a mask to do your color correction of the shadow.
Animation Technical Director - Washington DC
linograndiotoy
OctaneRender Team
Posts: 1353
Joined: Thu Feb 01, 2018 7:10 pm

Using Premultiplied with Black should help.
elsksa
Licensed Customer
Posts: 784
Joined: Sat Jul 24, 2021 1:06 am

Joining Lino, (associated, known as premultiplied) "alpha" is problem-free when properly encoded and setup in comp/post.
Yngvai
Licensed Customer
Posts: 27
Joined: Thu Nov 11, 2021 11:13 pm

Tried the premultiplied alpha both in AE and also in the Octane output options but it didn't work. That said, it's not a huge deal...it's a pretty minor thing and adjusting the white input on the alpha in AE is good enough.
Yngvai
Licensed Customer
Posts: 27
Joined: Thu Nov 11, 2021 11:13 pm

Bringing this back up because it may also be related to problems I'm having in [this post.

It doesn't seem to matter whether I use premultiplied or not. Various combinations all result in a white outline around the car tire if I render the car and render the ground plane/shadow catcher separately.

Image


I'm not sure if there's some step that I'm missing? Files are being rendered in RGBA OpenEXR format, ZIP (lossless) compression. I'm using the "Premultiplied Alpha" checkbox in the Octane Blender plugin to determine whether to premultiply or not for the render. Octane Camera Imager is checked ON, with Response type as "sRGB" and "Neutral response" checked. For color management, Display Device is set to sRGB, View Transform to "Raw", and Sequencer to sRGB. Gamma is at 1 and exposure at 0. Also "Keep environment" is turned off.

[Someone here reported a similar issue with the Blender plugin but said it was due to the color management settings. And I don't see anything wrong with my color management settings in this case.

[This person reported a similar issue when rendering shadow and beauty pass separately and premultiply also did not work for this person.
Yngvai
Licensed Customer
Posts: 27
Joined: Thu Nov 11, 2021 11:13 pm

Seeing that this person had the same issue,, I decided to try his solution of checking "Disable partial alpha" in the Camera Imager settings.

This fixed the problem, but did introduce jagged edges around the car. Like his hack, I applied "Refine Hard Matte" effect in AE and increased feather to 10 and got a nice clean image.

Image

Still, I'd prefer a real permanent solution rather than a hack. Premultiplying was not working, and it looks like I'm not the only person whose had this issue in the past when rendering a shadow layer and object/model layer separately as opposed to combined.

I'll also note that this hack is only acceptable in certain renders I'm doing but doesn't work as well in others, depending on the nature of the edges.
Yngvai
Licensed Customer
Posts: 27
Joined: Thu Nov 11, 2021 11:13 pm

SOLUTION FOUND!!!!!!!!!

I came up with an elegant clean solution to this problem, and no need for run separate render passes for the ground plane and car like I was doing before (which would double my render time).

I have a RenderLayerID of 1 for the car and RenderLayerID of 2 for the ground plane/shadow catcher. Originally I was doing separate renders, rendering layer 1 and 2 separately and compositing both in AE. 
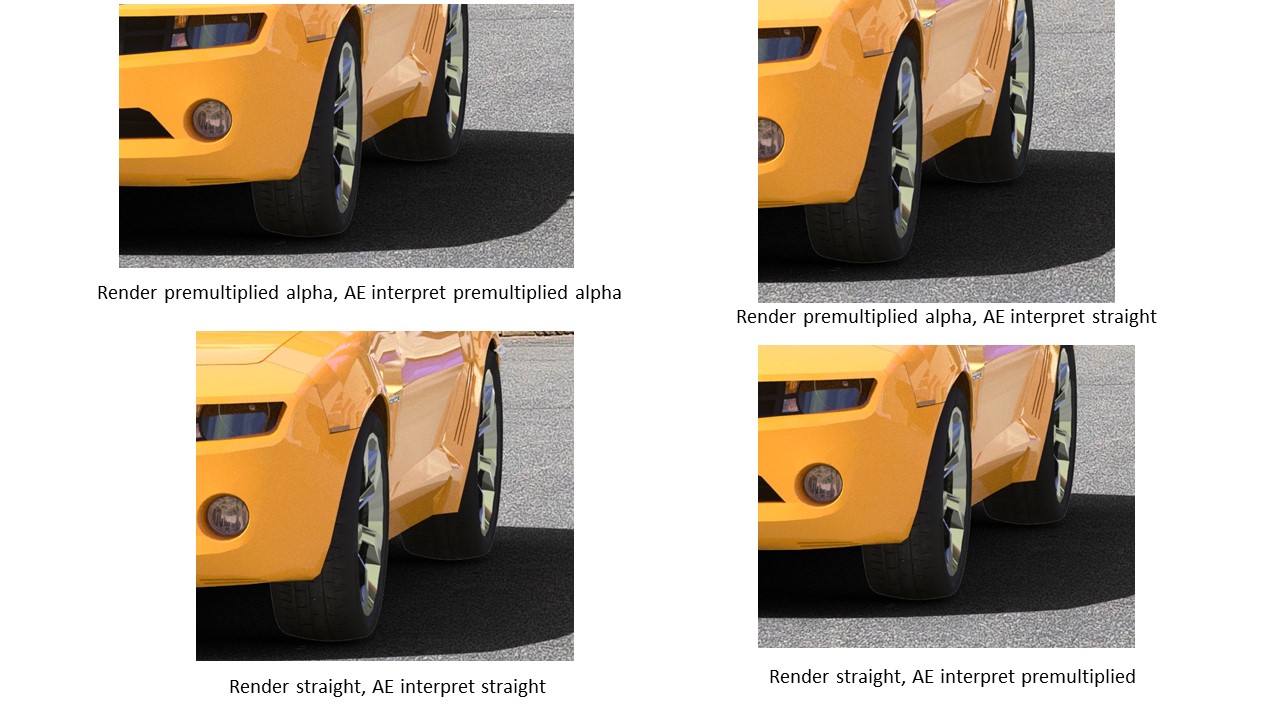
I constantly kept getting the white line, regardless of whether I premultiplied during renders or not. And while choosing "Disable partial alpha" in Camera Imager settings fixed the issue, it introduced jagged edges around the car. While applying "refine hard matte" helped fix this, it wasn't a permanent solution as some renders of other objects would end up looking a bit ugly.

I then thought I might be able to use cryptomattes to solve this issue, as Blender Octane had an option to do cryptomattes by RenderLayerID. My thought was I could isolate the shadow catcher plane from the car in AE using the cryptomatte IDs, and thus be able to color adjust the shadow independently of the car in AE. However, I couldn't get Blender Octane to generate cryptomattes by RenderLayerID, and the shadow catcher plane object would not show up in the cryptomatte object list.

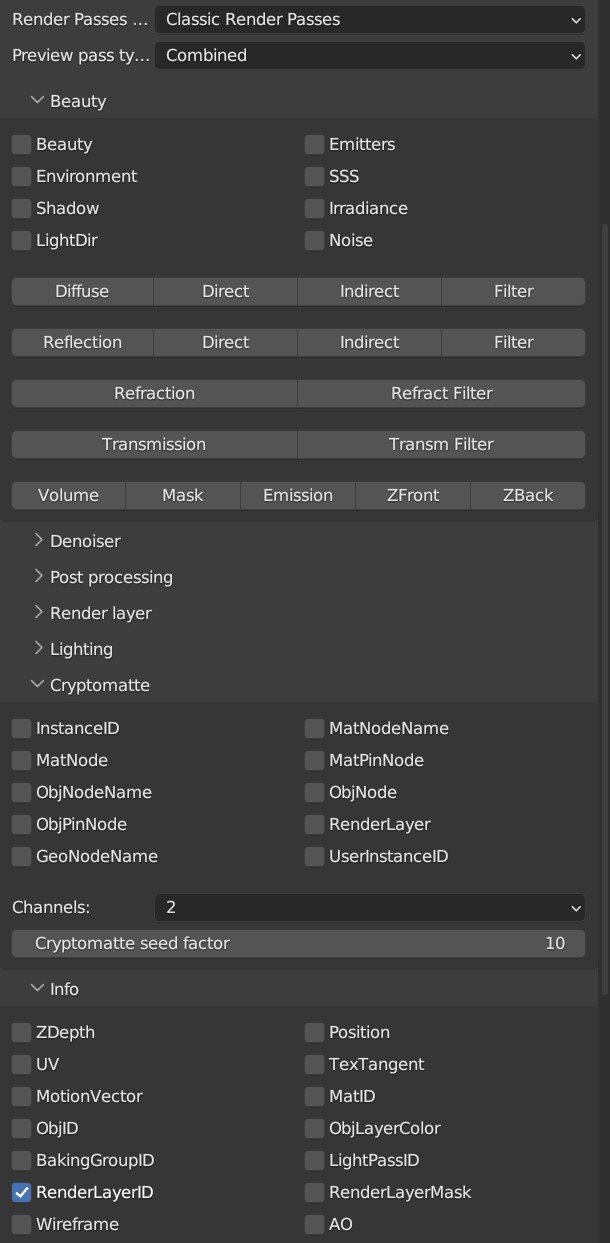
My final solution, which worked well, was to use a concept similar to cryptomattes. In the Blender Octane classic render pass options, there's a "RenderLayerID" under info. It produces a color coded matte for the different render layer IDs.

Image

Image

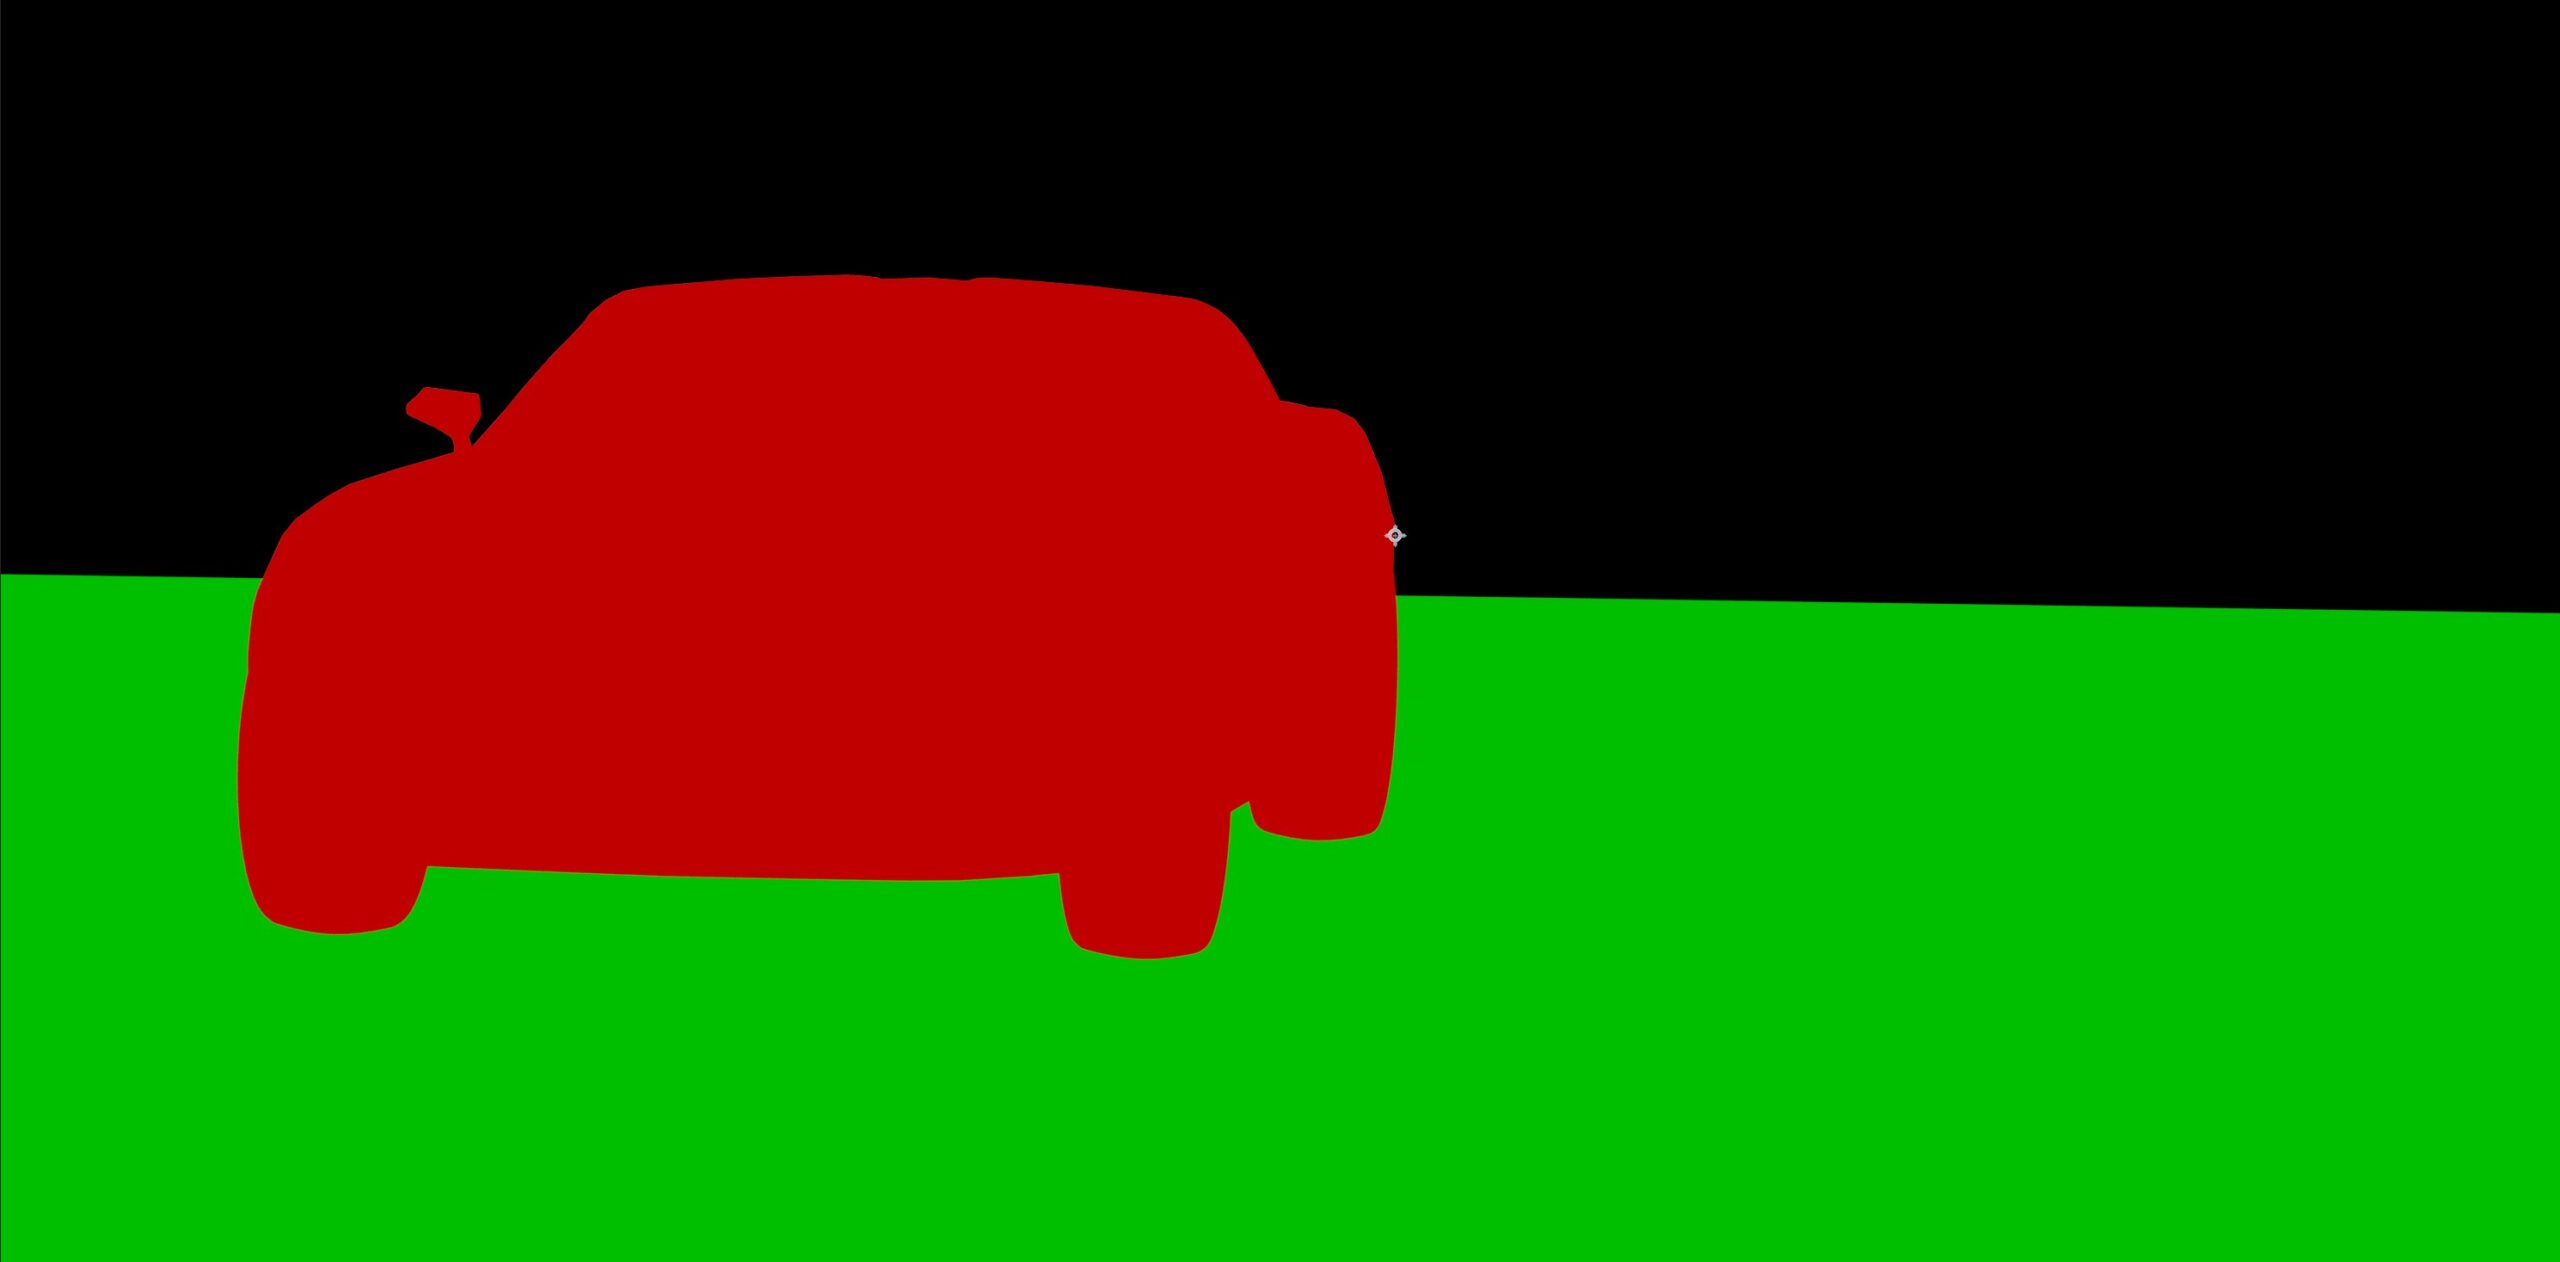
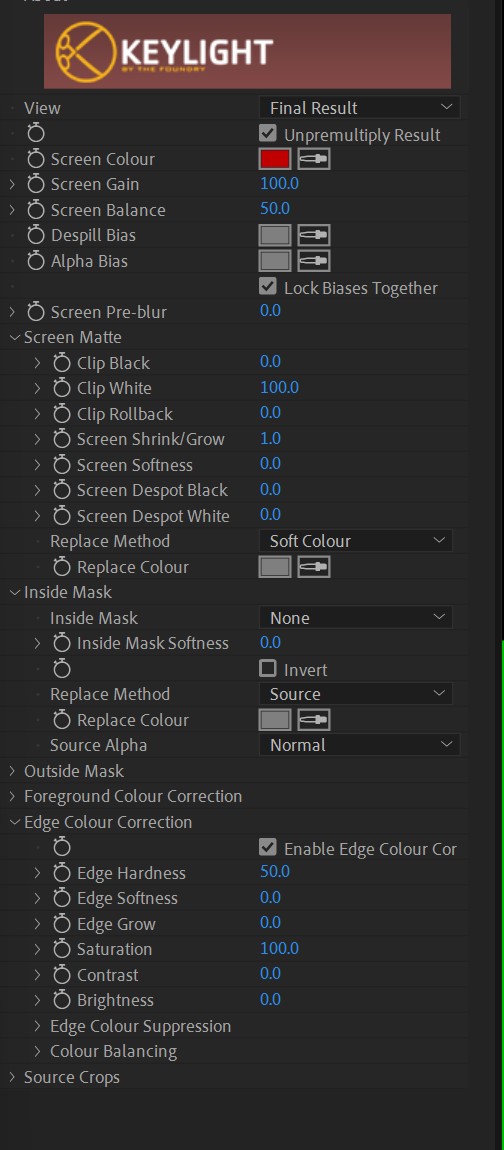
I brought the final beauty pass EXR into AE (and duplicated it), along with this RenderLayerID matte. I duplicated the RenderLayerID matte, then used KeyLight to key out the red in one layer and key out the green in the other. I then used these as track mattes. I linked one beauty pass to the shadow track matte and the other beauty pass to the car track matte.

Image

I still had tiny faint white outline, but not as strong as what I had when I first had this problem. I fixed this by going into the ground plane track matte, going into the Keylight effect (where I had keyed out the red) and increasing the screen shrink/grow from 0 to 1.

Image

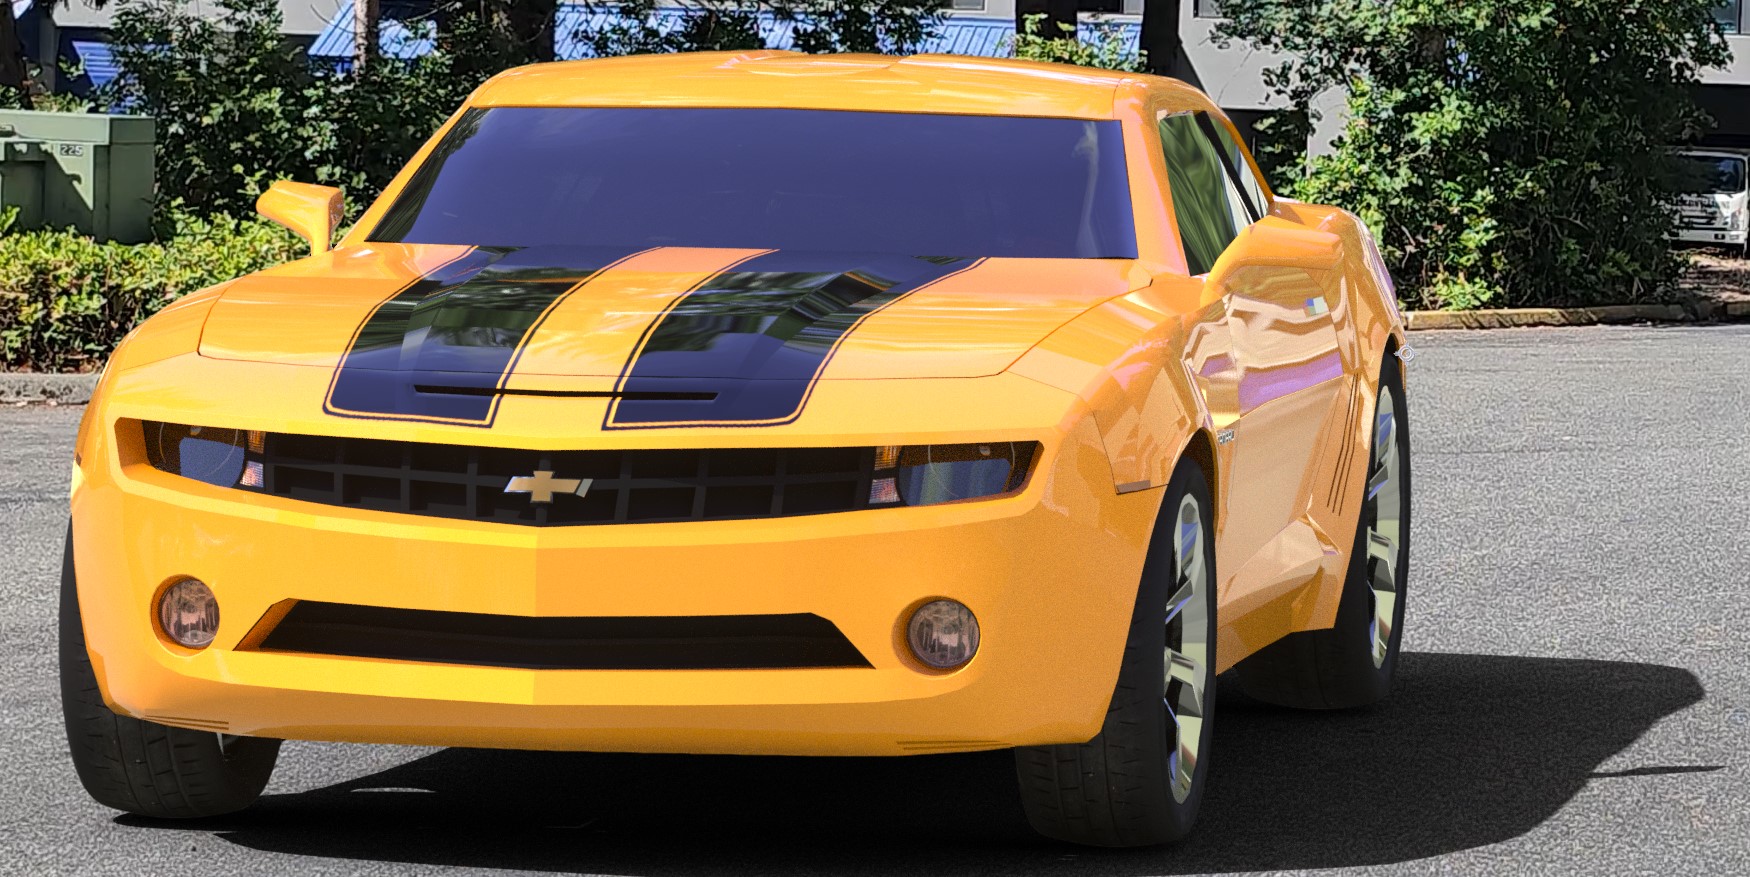
The final result was a nice clean combination with no white outlines, and it now allows me to adjust the shadow independently of the car. And I don't need to double my render time by running separate renders for the ground shadow plane.

Image
linograndiotoy
OctaneRender Team
Posts: 1353
Joined: Thu Feb 01, 2018 7:10 pm

We need to look into it, by the way.
Yngvai
Licensed Customer
Posts: 27
Joined: Thu Nov 11, 2021 11:13 pm

linograndiotoy wrote:We need to look into it, by the way.
Thanks. If you want some of my files to help for testing and debugging, let me know.
Post Reply

Return to “Blender”