We are excited to bring you the first experimental release of 2019.2.
As with all experimental builds, please do not use this for production purposes. We can't guarantee that scenes saved with this version will be compatible in future releases, and we anticipate there being several maintenance releases.
We look forward to your feedback on this release. If you have a V4 license or an all access subscription, you can test 2019.2 XB1 until the first stable release.
We recommend you to update your NVIDIA driver to at least 419.35 or newer.
What's new in 2019
New updates for monthly Octane Studio Subscriptions:
- Support for all DCC plugins
- NVLink
- RTX multi-GPU support
- Upgrade path to get all Enterprise features as monthly subscription (coming soon)
- RTX mode
- SSS improvements and Random walk SSS
- Spectral hair material
- Volume sample position displacement
- Spectron area/sphere primitives
- Volume step % and shadow step %
- New Universal Dirt system
- Vectron Volumes
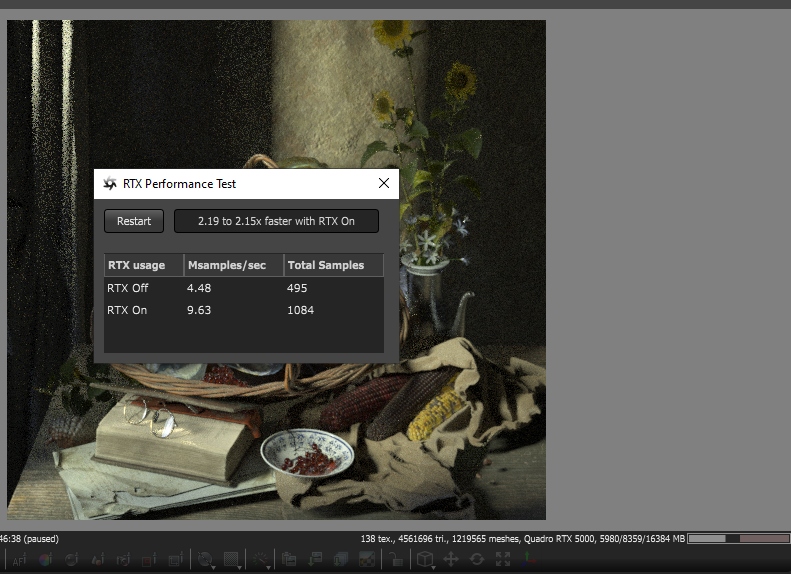
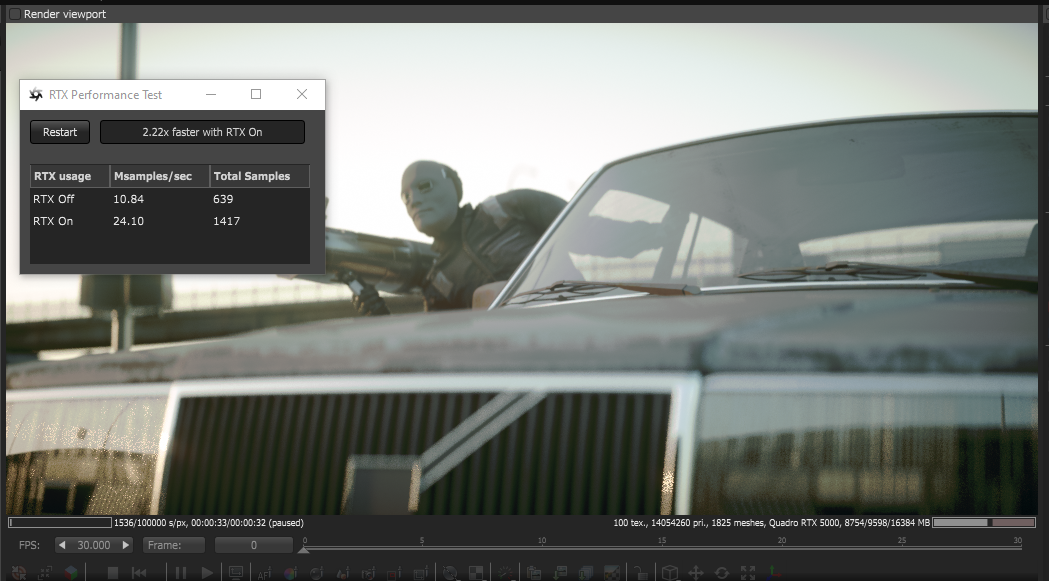
In 2019.2, we have added RTX support that speeds up raytracing. RTX on NVidia cards brings the next level of performance to Octane. We have implemented triangle mesh tracing in this experimental release, while highly scene dependent, we have witnessed render performance increase by as much as 300%.
To benchmark for scenes with RTX on mode vs RTX off mode, please refer to the benchmark and RTX preview build available at:
viewtopic.php?f=7&t=71067
viewtopic.php?f=7&t=70705
Below are example scenes with their speed improvement with RTX on mode vs RTX off mode:
Random walk SSS
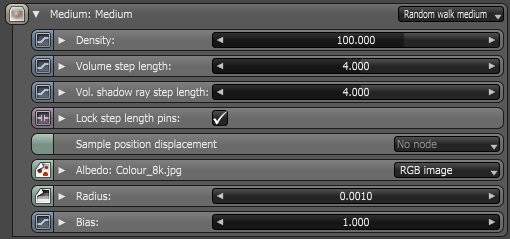
We have added the Random Walk medium. This medium node takes in an albedo texture for specifying the expected SSS color, as opposed to the traditional absorption/scattering color spectrum in other medium nodes. You can also specify a color radius texture, which represents how far the light scatters into the medium.
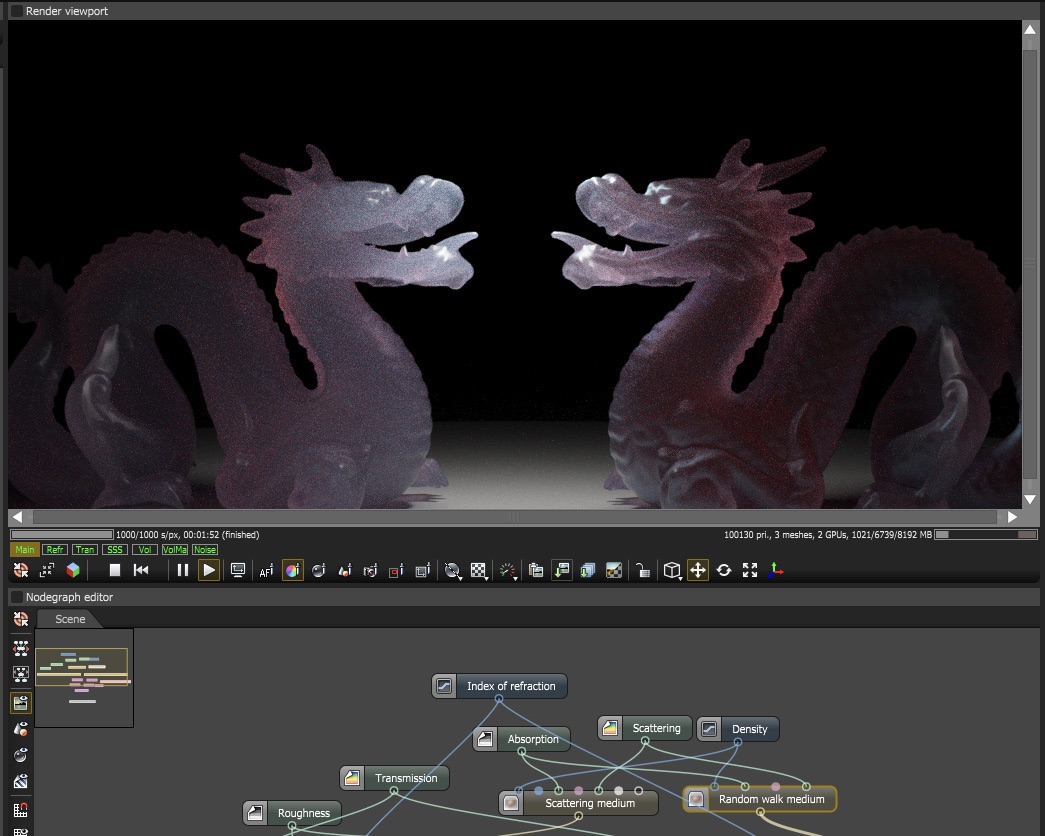
In addition to random walk, we have modified our old media so that you can provide any texture as input to scattering/absorption textures. Including for when you want to use them for volumes.
Other than that, we have also introduced a bias slider for interpolating between the unbiased vs biased scattering in the medium. The biased scattering method (when bias is 1.0) enables faster convergence, but also allowing you to mix the two methods for meshes with high curvature.
Random walk SSS can be attached to any existing material similar to other previous medium nodes. Furthermore, it can be used in conjunction with layered materials to simulate things such as skin material.
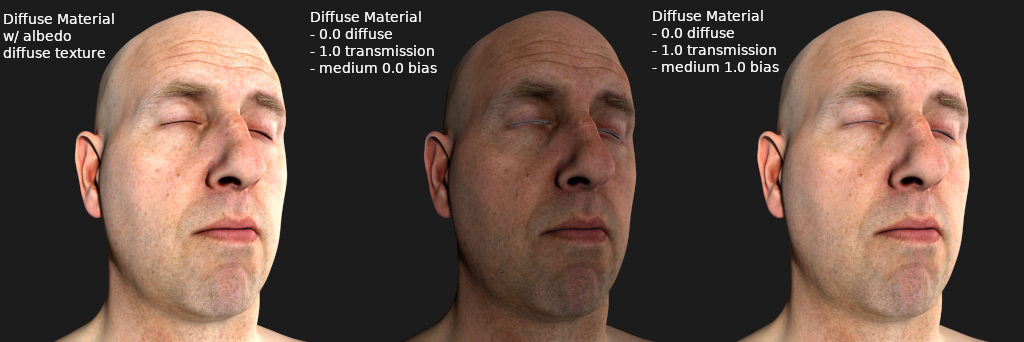
Below is an example of random walk SSS in action, here we compare diffuse material with albedo texture in the diffuse slot (left), vs diffuse material with 0.0 diffuse reflection and 1.0 diffuse transmission with the new randomwalk medium node using the albedo texture as the medium scattering albedo with 0.0 bias (center), vs diffuse material with the new randomwalk medium node using the albedo texture as the medium scattering albedo with 1.0 bias (right). As we can see in the image, when the old scattering method is used (0.0 bias), the subsurface scattering is alot darker due to rays being lost inside the medium, but when the new random walk SSS is used (1.0 bias), the subsurface scattering effect does not lose as much energy inside the medium.
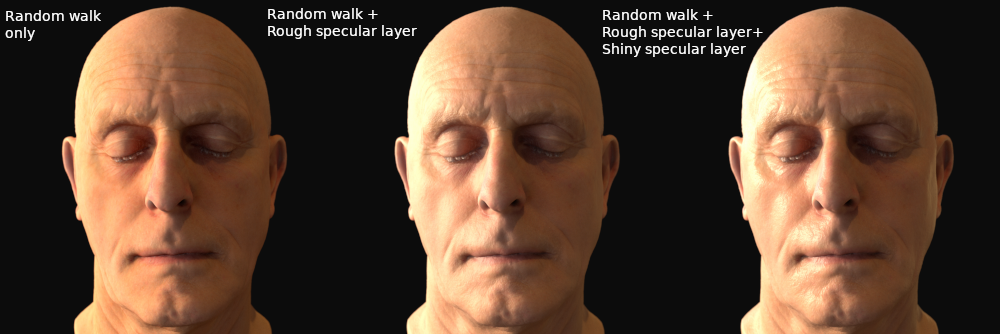
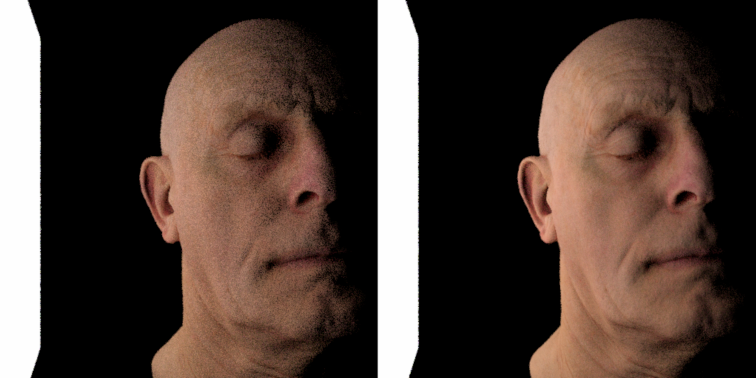
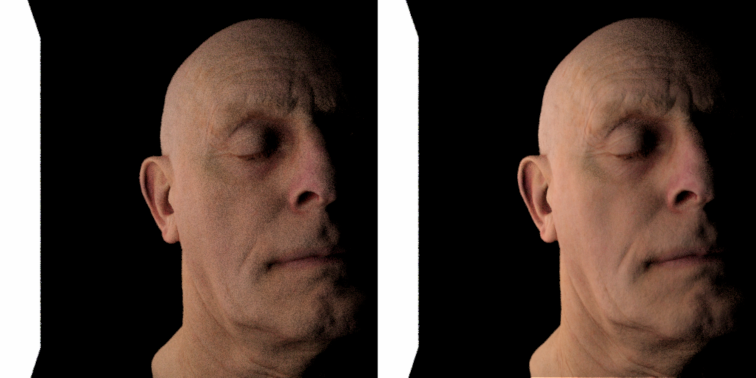
Below is an example of using random walk SSS for skin material. Random walk SSS with diffuse material/specular material can be used together with existing material layers from 2019.1. We can use multiple specular layers on top of the bottom medium layer for simulating multi-layer oily skin:
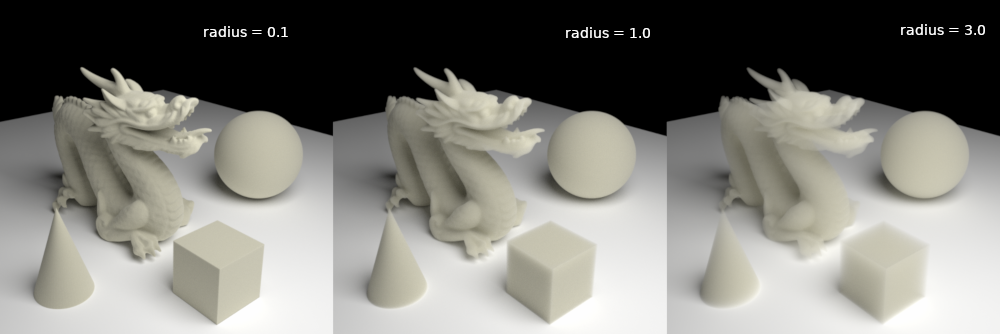
Here is an image showing how radius works in random walk SSS, the higher the radius, the more waxy the subsurface scattering effect would look on the model, where as the lower the radius, the more diffuse surface like it would look:
The orbx for random walk SSS radius is available at: https://render.otoy.com/downloads/36/b0 ... adius.orbx
Spectral hair material
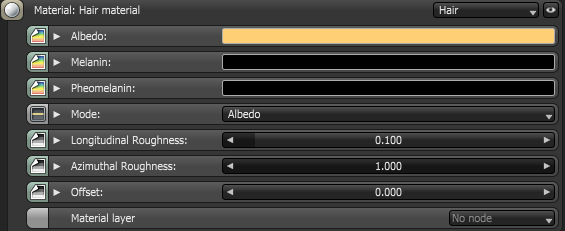
We have implemented a new hair material in 2019.2 that improves hair rendering realism in general for Octane. The difference between hair material and traditional diffuse/specular materials is that hair material assumes the geometry it's assigned to is strictly a hair spline, allowing pre-integration for multi-scattering effects that occur in hair geometry.
Hair material has its unique set of parameters, allowing different coloring modes for hair, and also multiple roughness parameters for different scattering behavior along a hair strand:
The image below shows the render of hair with varying longitudinal roughness from low (left) to high (right):

Below is an image of hair material with varying azimuthal roughness from low (left) to high (right):

Volume sample displacement
Volume sample displacement allows you to use arbitrary textures to shift the sampling position inside the volume grid at all positions. In the case of noise, you can add micro detail without having to modify the volume data at all, and can be adjusted in real time.
Below are some images with volume sample position displacement with various settings:
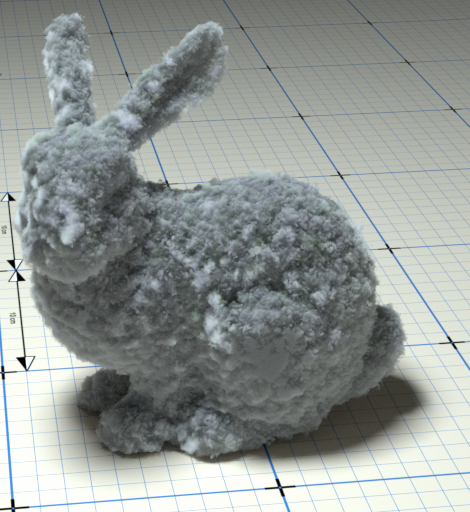
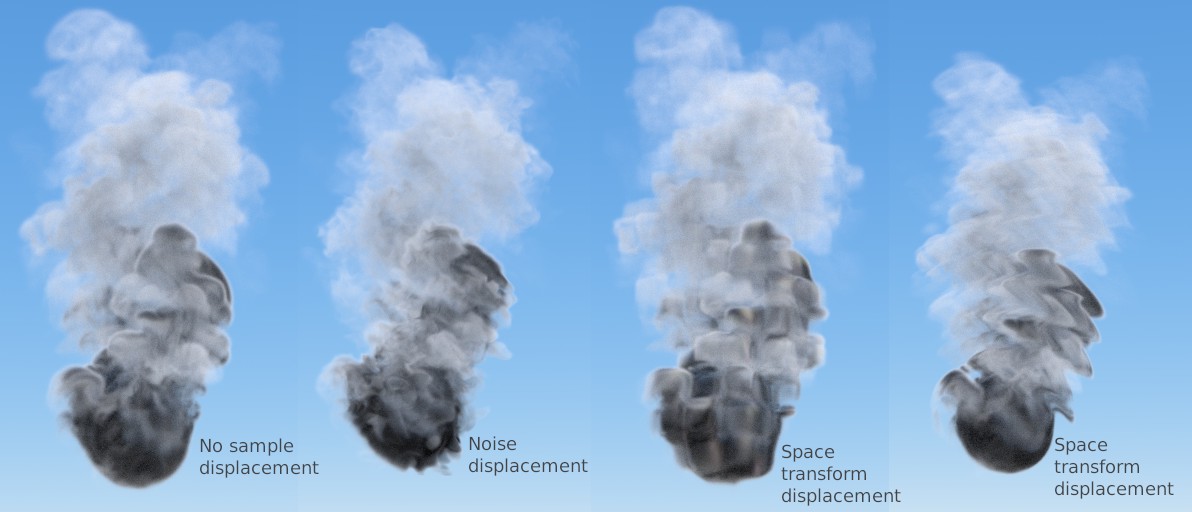
The sample orbx for the above image is available at: https://render.otoy.com/downloads/15/48 ... displ.orbx
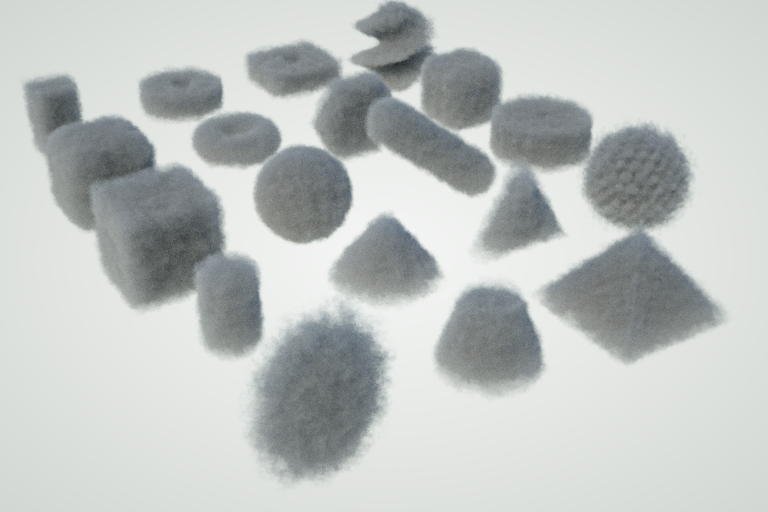
Vectron Volumes
Vectron can now be used to create volumes at render time. By using an SDF input to volume scattering and absorption, you can use the same objects to define volumes instead of surfaces, as shown below:
Spectron area/sphere primitives
We have added two default light primitives (including geometry) for 2019.2:
- Spectron area primitive
- Spectron sphere primitive

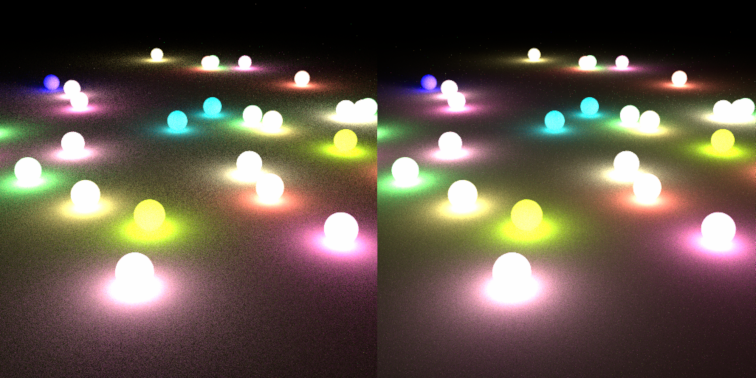
We allow basic primitive scaling for both light types at the geometric level, and allows the usage of position node in conjunction for geometric transformations. We have also improved the light sampling algorithm for these two light primitives, taking into account the subtended solid angle of the receiving mesh surface. This will allow for improvement in noise reduction for direct light sampling, and will generally improve convergence of the image at a faster rate versus the usage of traditional mesh light sampling.
Here is a comparison of a sphere mesh emitter vs the Spectron sphere light:
Another look at the mesh quad emitter:
Another look at the new Spectron area light:
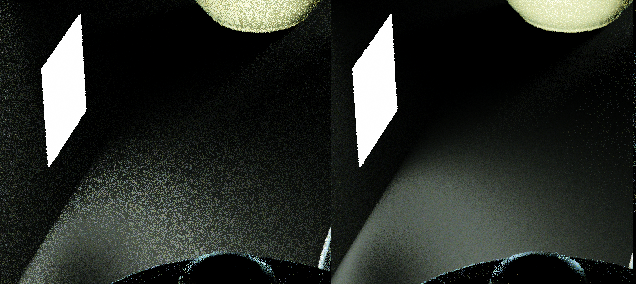
The following image shows the effect on the noise of the image using spectron area light versus traditional mesh light (at 1 samples per pixel) :

Spectron area light vs traditional mesh light (10 samples per pixel):
and Spectron area light vs traditional mesh light (20 samples per pixel):
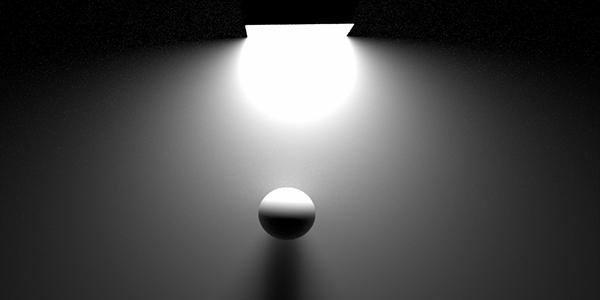
We have included an orbx which allows for further modifying the quad light into a spotlight, an example of the extra parameter here is spread. Controlling the spread allows you to control the directionality in which the light emits.
An example of the customized spot light with 0.1 spread:
An example of the customized spot light with 0.2 spread:
An example of the customized spot light with 0.3 spread:
An example of the customized spot light with 1.0 spread:
The customized spotlight script is available as an orbx in: https://render.otoy.com/downloads/d9/07 ... light.orbx
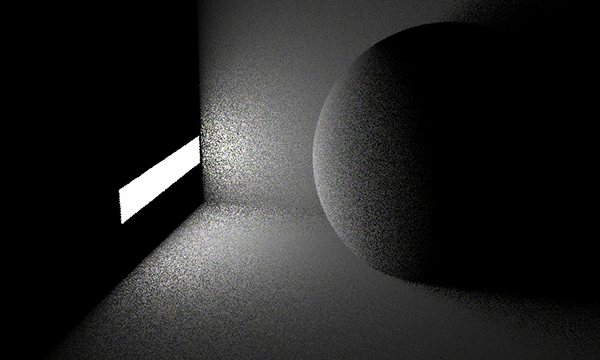
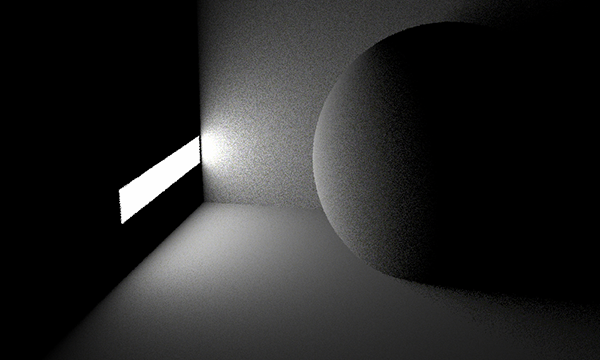
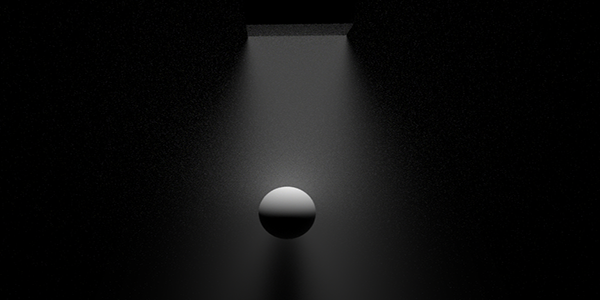
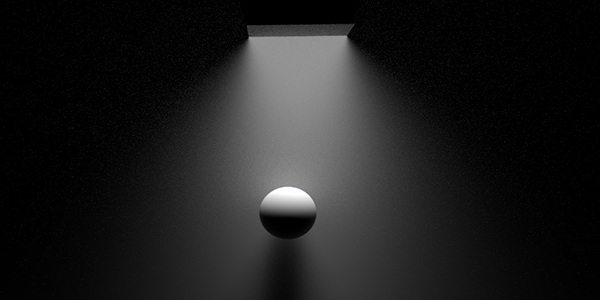
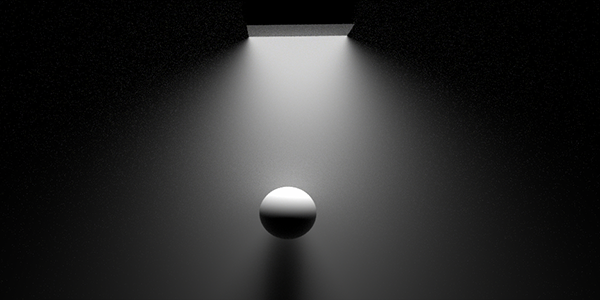
The following three images show the effect on the noise of the image using Spectron sphere light versus traditional mesh light (at 1 samples per pixel, 10 samples per pixel, and 20 samples per pixel):

Volume step % and shadow step %
The step length inside medium/volume medium nodes is decoupled into general ray step length and shadow ray step length. By default, these are locked to the same value like previous versions of Octane. With this new feature, you can now decouple them and increase the ray step length of the shadow ray independently to avoid over raymarching unnecessary when not needed, which would improve the speed of volume tracing and reduce final render time.
Below is an image for comparison of volume ray march with various step length vs shadow step length (cloud model provided by Disney):

New Universal Dirt system
The dirt texture node is improved in 2019.2 with additional parameters for better flexibility. Prior to 2019.2, the dirt node used a uniform cosine sampling method for tracing out rays from the material surface, which caused an overall more uniform look to dirt similar to unbiased ambient occlusion.
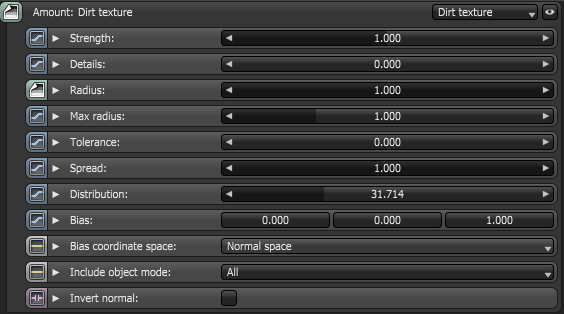
In 2019.2, we have introduced several parameters for biasing the dirt node, so that you can control the spread of the rays, making it a cone rather than a cosine sampling method. You can also now control the distribution of the dirt rays, to make it more concentrated against the surface normal or more evenly like prior to Octane 2019.2. Additionally, we have modified the radius of the dirt node to be a texture input, so that you can control spatially the trace distance for a surface point.
Below is the parameters exposed for the dirt node:
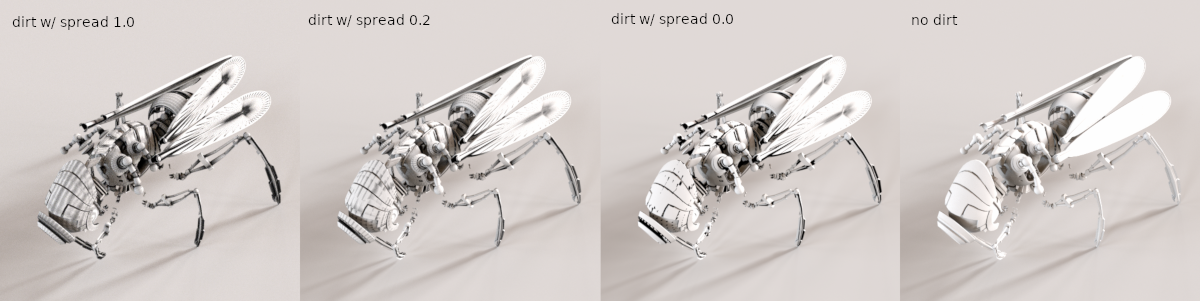
Below is an image to illustrate what the spread parameter does. Dirt texture is attached to the ground plane here for visualization purposes. The lower the spread is, the sharpter the dirt would be since it's always sampling the dirt ray in one direction:
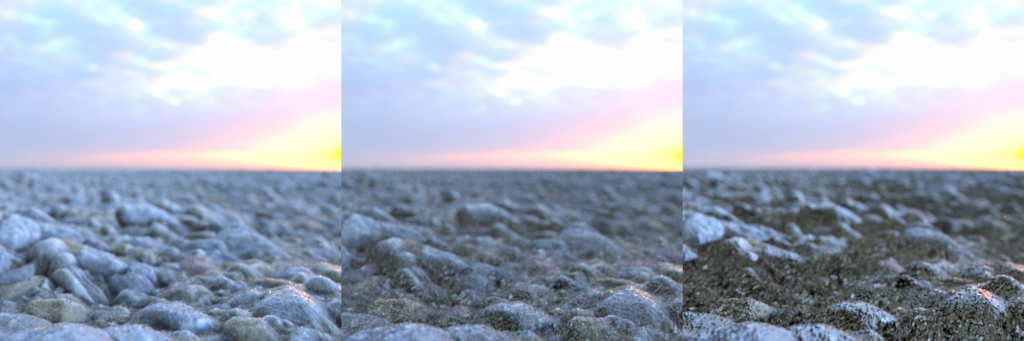
The dirt distribution makes the dirt ray more concentrated in the normal direction, or the normal + bias direction, the left image is with default 1.0 distribution (evenly distributed dirt rays), while the right image is with 1000.0 distribution (concentrated in the normal + bias direction):

Here is a comparison of dirt off vs unbiased dirt vs biased dirt:
Downloads
For customers with a Studio subscription license:
OctaneRender Studio 2019.2 XB1 (Windows installer)
OctaneRender Studio 2019.2 XB1 (Windows zip)
For customers with a Enterprise subscription license:
OctaneRender Enterprise 2019.2 XB1 (Windows installer)
OctaneRender Enterprise 2019.2 XB1 (Windows zip)
For customers with a regular V4 license:
OctaneRender 2019.2 XB1 (Windows installer)
OctaneRender 2019.2 XB1 (Windows zip)


