How to use the lighting passes

Tutorials for OctaneRender - demonstrations and howto's.
User avatar
stratified
OctaneRender Team
Posts: 945
Joined: Wed Aug 15, 2012 6:32 am
Location: Auckland, New Zealand

Hi everybody!

In this write-up I'll quickly explain how to set-up and use the new light passes introduced in OctaneRender 2.21. A light pass isolates the contribution of a light source. Each light pass behaves as if all the other lights in the scene are switched off. The individual light passes can be added togheter in post to recreate the original render or to tweak the individual contributions of each light. The light passes available in Octane are:
  • Sunlight: Captures the light contribution of the sun. Only useful when a daylight environment is configured.
  • Ambient light: Captures ambient light either from the sky in a daylight environment or from the texture in a texure environment.
  • Light pass 1-8: Light passes 1 to 8 capture the contribution from mesh emitters. Emitters (both texture and blackbody) have a light pass ID pin assigning an emitter to a light pass. It's possible to assign multiple emitters to the same light pass. If nothing is configured, all emitters contribute to light pass 1.
I created a small example scene (granted, not really a realistic scene). It consists of 3 sphere on a ground plane. The lighting of the scene consists of 3 planes emitting red, green and blue light and a daylight environment:
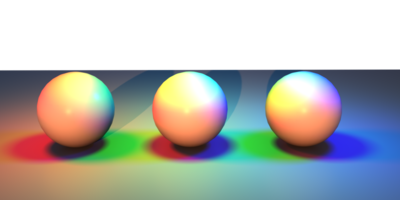
Our example scene (daylight + 3 mesh lights).
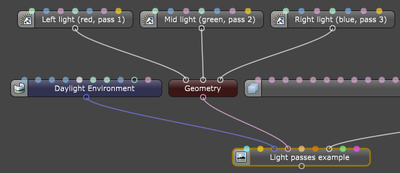
The nodegraph setup of the scene.
First we need to assing each emitter an ID to map it the desired light pass. We assign the emitters to light passes 1, 2 and 3.
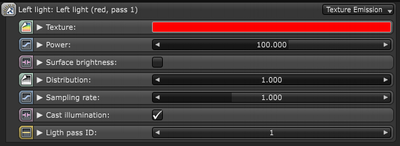
The light pass IDs are configured in the emission node.
Next we need to make sure we actually have the correct lighting passes enabled. We can do this in the render passes node:
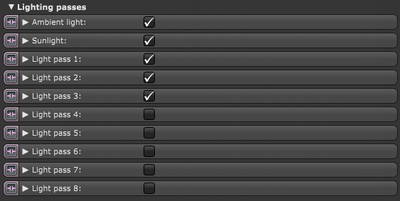
The light passes are enabled via the render passes node.
Each individual render pass will looks like this:
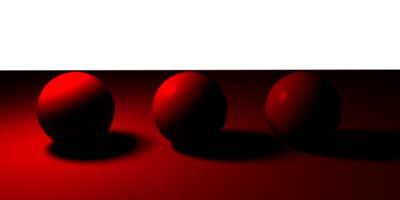
Contribution of the red emitter.
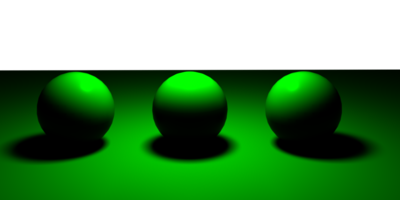
Contribution of the green emitter.
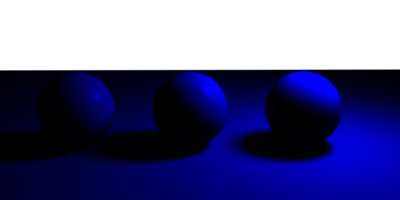
Contribution of the blue emitter.
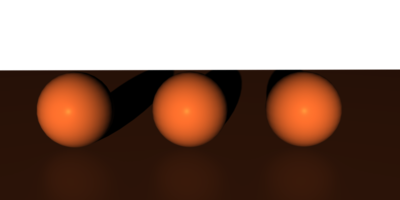
Contribution of the sunlight.
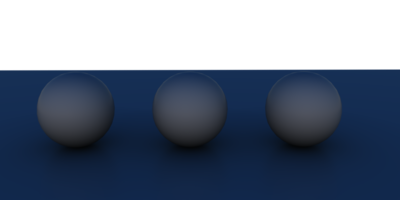
Contribution of the ambient light.
The individual passes need to be combined in post with the additive blend mode. Find attached the Octane project and GIMP and Photoshop project files demonstrating how to put it all back together again.

Please feel free to ask any questions if something isn't clear.

cheers, Thomas
Attachments
gimp_and_photoshop.zip
GIMP and Photoshop project files
(6.8 MiB) Downloaded 1073 times
light-layers-tutorial.orbx
(116.97 KiB) Downloaded 951 times
User avatar
stratified
OctaneRender Team
Posts: 945
Joined: Wed Aug 15, 2012 6:32 am
Location: Auckland, New Zealand

Bumped this one up.
ten
Licensed Customer
Posts: 218
Joined: Fri Apr 18, 2014 10:43 am
Location: England

nice, thanks for this strat!

ten
( PC ) i7 5960x octal 4.5ghz / 64GB / 2x Titan X 12GB / 1x 780 6GB - ( Laptop ) i7 4790k 4ghz / 32GB / 980M 8GB - Octane CD4 2.x / C4DR16.x / win 8.x
User avatar
glimpse
Licensed Customer
Posts: 3740
Joined: Wed Jan 26, 2011 2:17 pm
Contact:

Great! =) thanks for taking time to explain things out.
User avatar
whersmy
Licensed Customer
Posts: 723
Joined: Thu Aug 30, 2012 7:40 am

Is this something like multilight? :o

I`m not sure when to use this option or what it contributes?
Octane 2022.1.1 nv535.98

x201t - gtx580 - egpu ec
Dell G5 - 16GB - dgpu GTX1060 - TB3 egpu @ 1060 / RTX 4090

Octane Render experiments - ♩ ♪ ♫ ♬
prodviz
Licensed Customer
Posts: 543
Joined: Sun Jul 14, 2013 6:00 pm

whersmy wrote:Is this something like multilight? :o

I`m not sure when to use this option or what it contributes?
Looks just like Multilight (nice). Each light having it's own pass.
User avatar
linvanchene
Licensed Customer
Posts: 783
Joined: Mon Mar 25, 2013 10:58 pm
Location: Switzerland

Thank you very much for the detailed description and especially the tutorial files. :D

It helped me a lot to be able to quickly see and test in photoshop how each pass in "Linear Doge (Add)" mode contributes to the final result.
Win 10 Pro 64bit | Rendering: 2 x ASUS GeForce RTX 2080 Ti TURBO | Asus RTX NVLink Bridge 4-Slot | Intel Core i7 5820K | ASUS X99-E WS| 64 GB RAM
FAQ: OctaneRender for DAZ Studio - FAQ link collection
User avatar
stratified
OctaneRender Team
Posts: 945
Joined: Wed Aug 15, 2012 6:32 am
Location: Auckland, New Zealand

whersmy wrote:Is this something like multilight? :o

I`m not sure when to use this option or what it contributes?
prodviz wrote:
whersmy wrote:Is this something like multilight? :o

I`m not sure when to use this option or what it contributes?
Looks just like Multilight (nice). Each light having it's own pass.
Hi,

Yes, in Maxwell for example this is called multilight. In Vray it's used via VRayLightSelect.

The typical use case is in a studio light setup (e.g. car model render, product render, ...). It allows you to tweak lighting to some extend in post. But I guess the prodviz guys here on the forum can tell you more about that.

Another use case I see is using it to denoise renders. Some lights (small point lights or the sun for example) will have a higher noise contribution. You could isolate those lights in a seperate layer and denoise that layer and comp it back togheter afterwards. In theory that should work. Never tried it so I don't know about practice :mrgreen:

cheers,
Thomas
prodviz
Licensed Customer
Posts: 543
Joined: Sun Jul 14, 2013 6:00 pm

Nice idea.
Post Reply

Return to “Tutorials”