Hi all,
with this post I would like to explain how you can render huge image using the tiled camera expression in C4D. You all probably know that the render buffer of Octane uses up quite a bit of memory of your graphics card and you may run into trouble if your scene is already quite large. By rendering your image in pieces you can work around this problem.
In the future we will very likely integrate a tiled rendering system into Octane, but it may be quite a while until we get to it. Fortunately the tiled camera in C4D allows you to do it right now and does everything automatic - only the stitching at the end has to be done by hand.
The first step is to prepare your scene for rendering in Octane, as usual. There is only one important thing you have to take care of: Set vignetting to 0 - otherwise your final image will have "nice" grid-like "shadows":
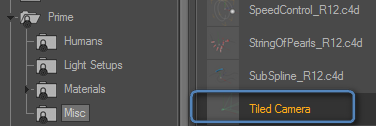
Then save the scene, close Octane and switch to C4D. Open your C4D scene and add a tiled camera object, which you can find in the content browser under Presets -> Prime -> Misc:
- content_browser.png (9.13 KiB) Viewed 6573 times
To setup the tiled camera, enable the tiled camera and drag the render camera object into the reference link field of the tiled camera object. You will find the link field in the User Data tab. Also specify the amount of tiling you want: If you choose 2, you will get 2x2=4 tiles. If you choose 3, you will get 3x3=9 tiles:

- tiled_camera.png (26.3 KiB) Viewed 6573 times
In the export configuration of the export plugin enable the camera export and choose the tiled camera. And setup the render resolution you want, but remember that the resolution of the final images will be 2/3/4/5 times higher, depending on the tile factor:
To render the tiles we use the animation rendering. To do that, switch to the project configuration of the export plugin and specify the name of the output images, the pixel samples (== quality) you want to render for each tile, enable camera animation as we only have to change the camera settings between two frames and specify a range of 0 ... 3/8/15/24 (depending on the amount of tiling you chose):
Click on "Render Animation" and wait until all frames have been rendered.
In this example I used Gimp for the stitching: With Ctrl-Alt-O you can load images as layer and then just place them correctly in the large image:
And this is the final result:
Look Mum: No seams

I hope that helps,
Marcus
In theory there is no difference between theory and practice. In practice there is. - Yogi Berra
